The paid transaction removal tool is used to transfer paid sales transactions to history. It is also used to consolidate balance forward accounts. It consolidates the balance forward transaction amounts and adds the total to the noncurrent aging period.
Paid transaction removal will speed up receivables processes, inquiries and windows should open more quickly. Also, since it removes paid transactions, old paid transactions will no longer display on monthly customer statements.
If you are keeping history, transactions are moved to history. If you aren’t keeping history, paid transaction removal removes paid transactions from the system. You will no longer be able to print reports containing information about the transactions that were removed. History settings are found in Tools>Setup>Sales>Receivables, then under the Options button.
If you are sending monthly customer accounts receivables statements and you want current paid transactions to show on statements, you should run paid transaction removal after running monthly statements.
Here’s how:
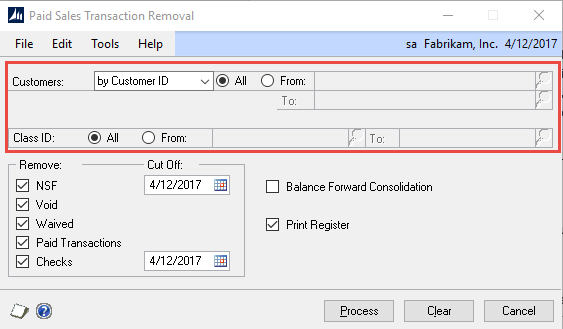
- Open the paid sales transaction removal window. Go to: Tools>Routines>Sales>Paid Transaction Removal.
- Choose all customers or select a range of customers. You can further restrict your choice by customer ID. The range of customers selected must also be in the class ID.

- You can select which type of transactions are to be removed. Choose your cutoff date to remove transactions. Checks have a separate cut off date because checks transferred to history or removed can’t be marked as NSF. You may want to choose a cutoff date that is one month prior to the transaction cut off date. You would avoid moving checks to history that potentially could be NSF.
- If you choose Balance Forward Consolidation, all documents for the customer are summarized and moved from the current aging period to the noncurrent aging period.
- Choose Print Register to print a removed transactions register.
- Last, click on the Process button to complete the removal.
If you have questions or need some assistance, visit our support page for more help.