
There are various ways to add a drop-down list in Acumatica. You could use the “out of the box” “Attributes” that are available for most of the entities or you can create a drop-down list field using the Customization tool. Let’s say you just want to add a field and the dropdown list will not change (or will not change often). If you use the standard attributes for the Entity, you may have to link the attributes table to other tables to display the attribute to existing or new reports & generic inquiries (GI). By adding a field to the main table, the field will reside in the table that already exists on your report or GI, and you can simply display the field; no linking to other tables needed.
Example: Build a Dropdown List
Let’s add the field “Region” to the Opportunity Screen.
- Click on the Customization button in the upper right corner.

- Click New & add a Project Name.

- Add a new field to an existing screen (locate the Opportunities Screen and press ok).

- Add a new field called “Regions” with a Data Type of Int.

- Now, publish the new field. This will save it in the SQL Database and Acumatica DAC tables so you can use it in your reports and inquiries.
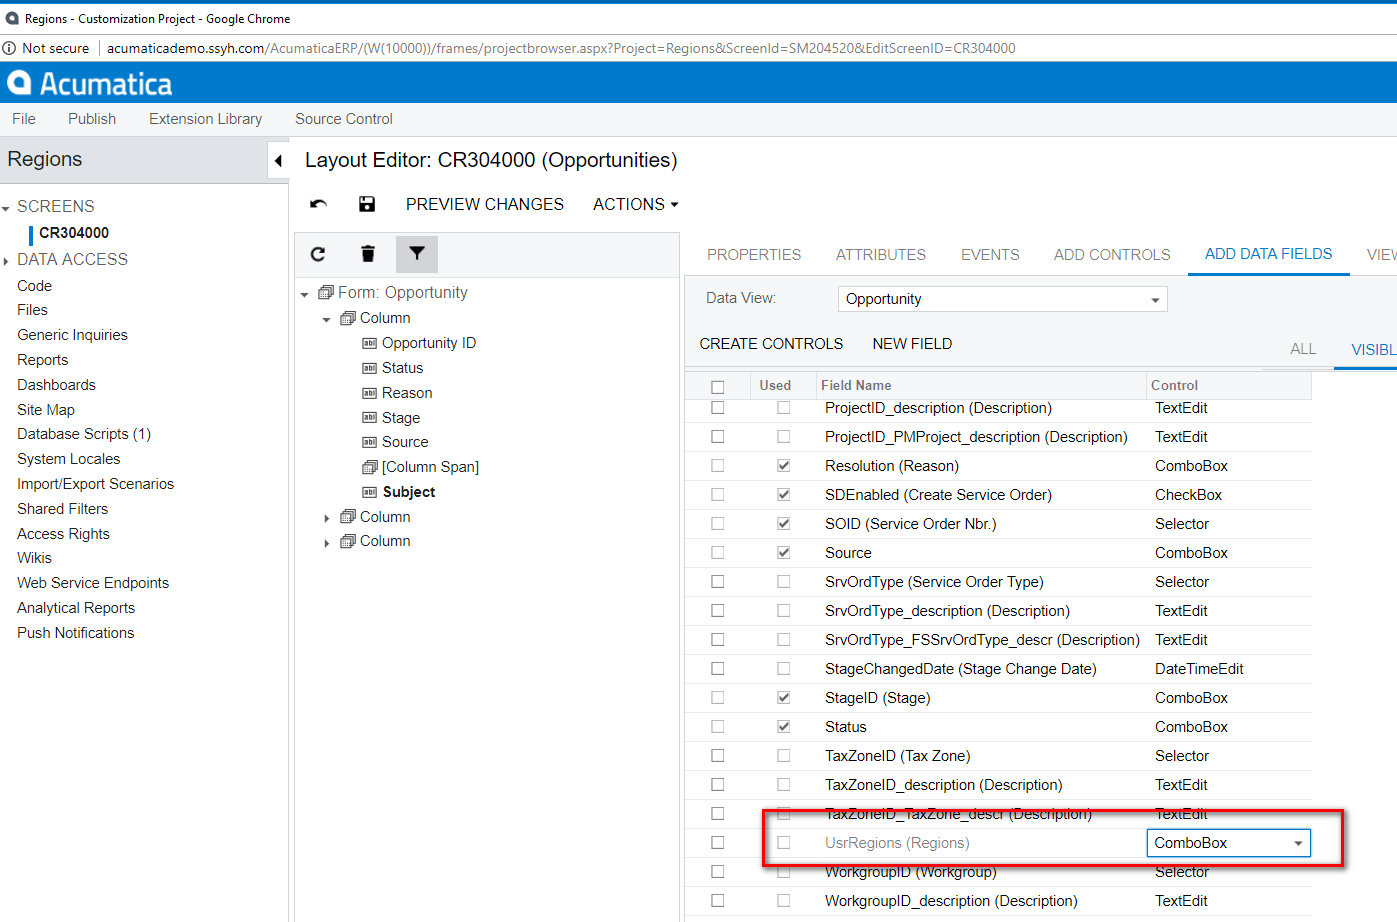
- After you publish it, select the field and change the data type from Text Edit to Combobox and then save that change. You might notice the field is still showing Text Edit, but it will update to a Combobox once you insert the list.

- Select the New Field, then select Attributes, and Customize Attributes.
- Insert the following code between the PXDBInt and PXUIField sections.
[PXIntList(new int[] {0, 1, 2, 3}, new string[] {"North", "East", "South", "West"})]The 0, 1, 2, 3 is Integer and the string list are the actual names selected on the Opportunity Form. If you need more options to select, you would just add more integer numbers and the corresponding string name.

- Save & Publish


Now if you access the opportunities screen, your new “Regions” field exists with the four dropdown options: North, East, South, and West. When you update this field, it will store the data in the table.

The new user field and associated data are now available for reports and queries and can be used and filtered by the user selections.


For more helpful information on Acumatica, check out our other blog posts at www.crestwood.com/blog.