
If you’re looking for easier ways to schedule your employee’s time, check out the scheduling management tool now in Microsoft Teams called Shifts.
It’s built mobile first for fast and effective time management and communication for teams. Shifts lets Firstline Workers and their managers use their mobile devices to manage schedules and keep in touch.
This scheduling management tool will help you create, update, and manage schedules for your team even when on the run. Shifts provides a platform to enhance communications and collaboration with fellow team members and management.
Shifts is replacing Microsoft StaffHub, effective June 30, 2020, and additional capabilities will roll out over time.
Here’s how to use Shifts:
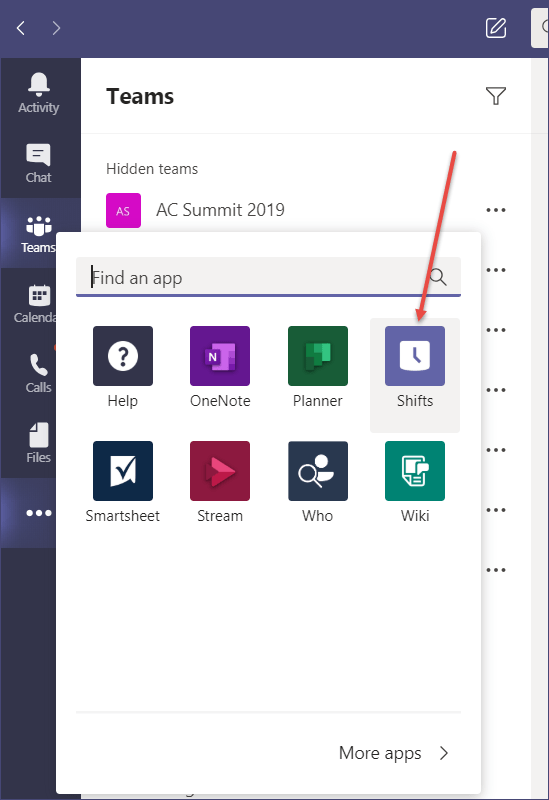
To access Microsoft Teams Shifts, click on the ‘3 dots’ on the menu bar to the left and select the Shifts App in the drop-down box.
The first step is to setup your Shift in the settings tab at the top menu bar.

Set up your:
- Time Zone: Select your time zone
- Schedule: What day of the week you would like the schedule to start
- Copy Shifts: Whether or not to include shift activities when copying shifts
- Open Shifts: Allow employees on this team to view and request open shifts on the schedule
- Requests: Manage the listed used for time off requests and add or remove categories
- Time Clock: Lets your team clock in and out of a shift with a mobile device. Also, when you enable location detection, it ensures team members are clocking in from a designated work site.


Requests Tab allows your employees to either schedule Time off, Swap shifts or Offer up their shift to someone else.

Time Off:

Manager can then approve or deny time off in one click.

Swap days:

Offer up shifts to other team members:

Next, Create a Shift
The first Step is to add team members to the schedule.
To the far right of the screen on the desktop version of Office 365, click Add People to select those who will be part of the shift for that week.

Note: You can schedule your team for the entire month by simply clicking on the calendar menu icon at the top of the screen. Select Week, Day, or Month.

Next, double click on a specific date to enter shift information. Another screen will appear that will allow you to enter details for that shift. In the examples/screen shots below, I will be entering info about my vacation time. You have the option to select the category associated with that days-time. When details are completed, click Save to the far right.

Once you enter the shift details click the save button. Your main scheduling screen will appear showing your team’s schedule for the week.

Once you have entered everyone on your Team’s schedule click save.
You can add as many groups as you like and create additional shifts based on different categories. Simply click on the Add Group button and repeat steps listed above.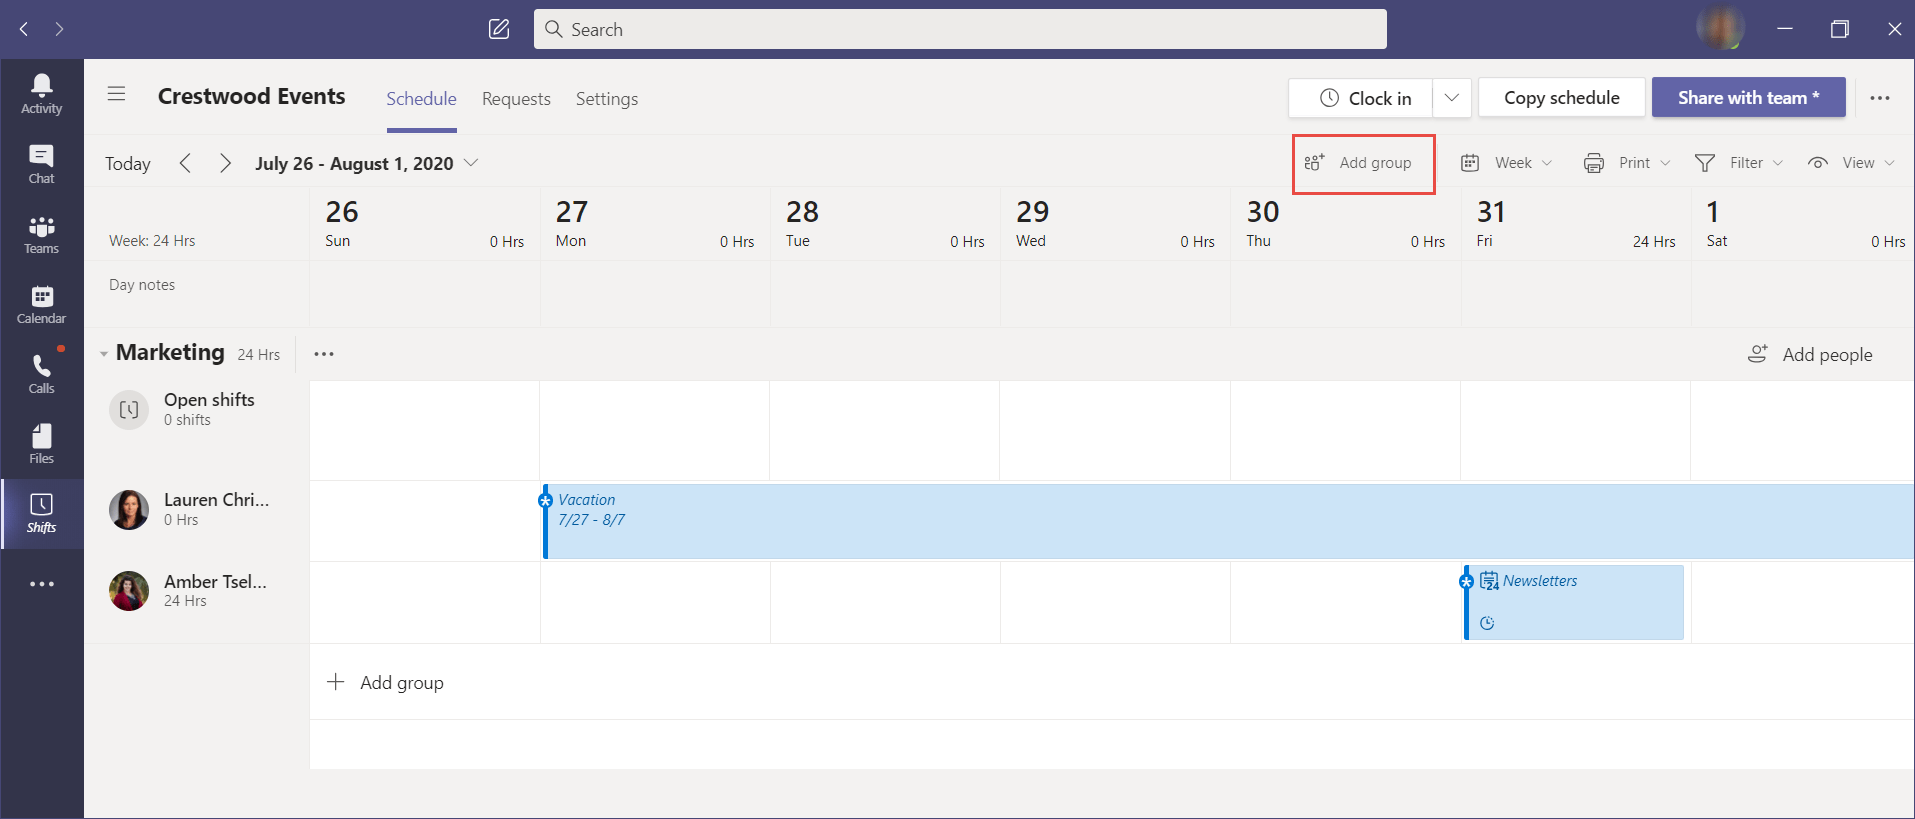
When all is said and done, you can Print, Filter and View criteria of each scheduled group.
Print: Scale to one page and select page type.

Filter: By Group or specific team members.

View: Your shifts, Teams shifts, or by people, groups and more.

After you have entered your group’s time, click the Share with Team * Button on the top right hand side of the desktop application. Another dialog box will appear showing you what day, week or month you are about to share. Next, select who gets to see this shift. I’ve selected Affected team members only in this scenario. You can select entire team if they are all affected by the shift schedule.

Once you Share with Team * a black bar will quickly pop up at the top of the screen to confirm shared Shift. If you make a mistake or have a last minute change in schedule, you can also Recall shared schedule by clicking on the 3 dots and selecting Recall shared schedule. In this area you can also refresh your screen, or import or export schedules.

After you have shared your Shift with your team, employees can now Clock In or Out to their shift using their mobile app. (Note: This feature will need to be turned on in your settings).

For more tips & tricks for Office 365, please subscribe to our blog.