
In my previous blog we went over the basics of applying image Styles to your photos. I showed you how to add different effects to your images, such as a drop shadow, glow, reflection, and more. In this blog we will cover the Arrange section of the Picture Format tool bar.
We will cover the following:
- Position
- Wrap Text – See Blog: How Do I Add and Format Text Around an Image
- Bring Forward & Send Backward
- Selection Pane
- Align
- Group
- Rotate

Position
The Position menu allows you to choose where the selected object will appear on the page. Text will automatically wrap around the image so that it’s still easy to read.
You can also use the More Layout Options to place your image in an exact location using measurements.

Bring Forward or Send Backward
When you have two images and you want one on top of the other, you will select either Bring Forward or Send Backward to position those images how you see fit.
Note: Right-click on the image to bring up the shortcut menu to perform the same functions.

Selection Pane
The Selection Pane allows you to see all your objects on the page. This will make it easier to select objects (even text boxes), change their order, or change their visibility. Click the eye icon to reveal or hide the image.
Align
The Align feature allows you to change the placement of your selected image or object on the page. Use this to align images or objects to the margin, center, top, middle, or the edge of the page. You can also align them relative to one another.
Click View Gridlines to better align your images. The gridlines make it easier for you to align images with other objects/images or locations on the page.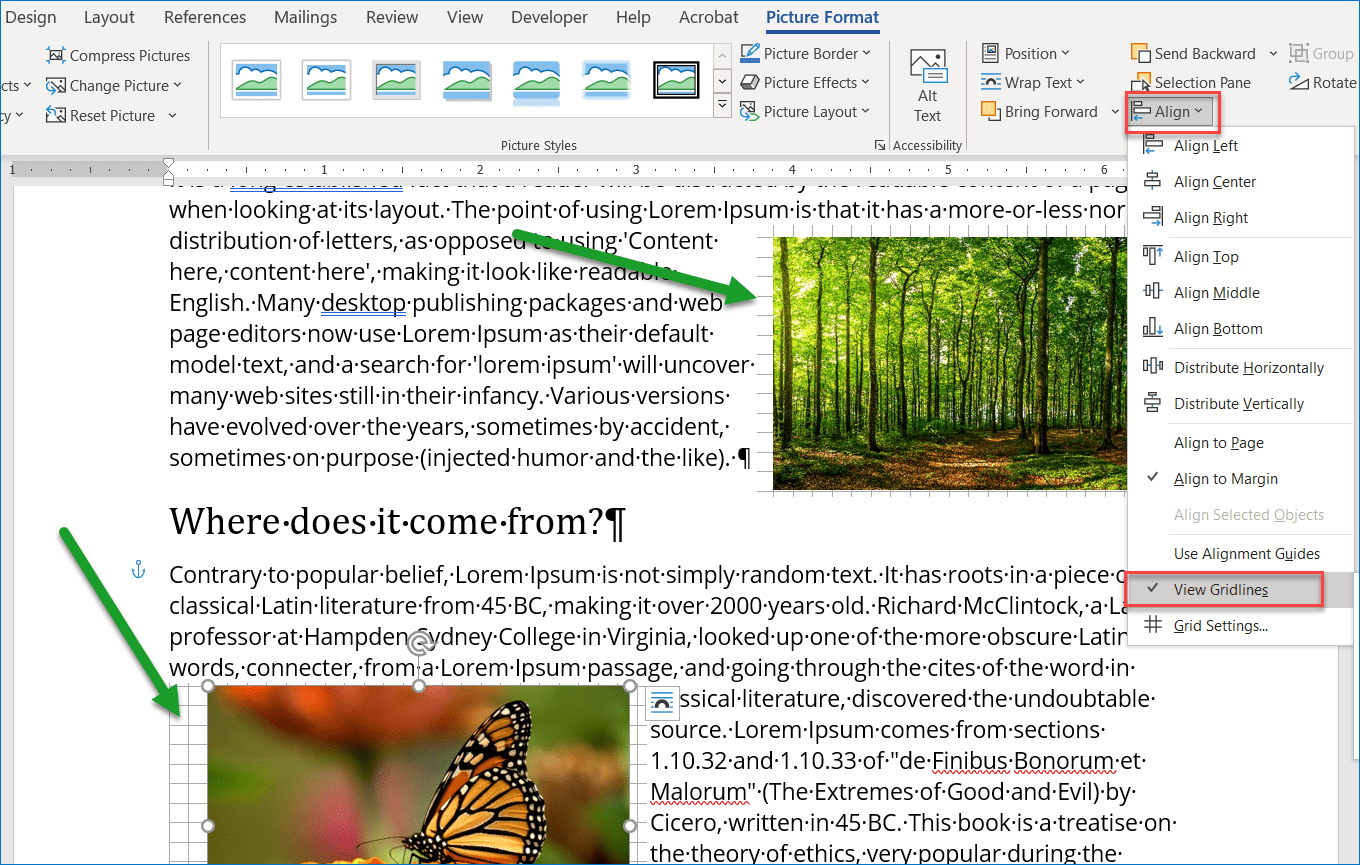
Click on the Grid Settings to manually set the position of your images or objects on the page.

Group
Group multiple objects together by selecting one object, then holding down the Shift key on the keyboard to select the next item, then click Group in the menu ribbon. This feature allows you to Group items together to move and format as one single object.

You can then select the single object and resize or reposition the image. 
To Ungroup the object, click on the grouped object, then go to the ribbon menu (or right click) and click Ungroup to break the connection to move them individually.
Note: You must have an image, text box or object selected to perform the function, otherwise the feature will be greyed out. You can also group multiple text boxes and images together.
Rotate
Easily rotate or flip an image on the screen. Select from: Rotate Right 90°, Rotate Left 90°, Flip Vertical, Flip Horizontal, and or edit rotation in the More Rotation Options.
That concludes the Arrange section of the Picture Format tool bar in Microsoft Word. In our next blog we will cover the different cropping options you can do with your images. For more tips and tricks for Microsoft Office 365 visit and subscribe to our blog.